
Recessed Lighting Wiring: How to Connect LED Driver Leads Without the Flickering
A practical guide to recessed lighting wiring connections, covering why the stranded-to-solid conductor mismatch causes flickering and failed connections and how inline lever wire connectors solve it.
Recessed lighting wiring is one of those jobs that looks simple until you get up the ladder and open the junction box. The house wiring coming out of the ceiling is solid-core. The leads on the LED fixture or driver are fine-stranded. Connecting them reliably in a cramped housing, one-handed, overhead, is where most recessed lighting problems start.
Wire nuts work on this connection in the sense that they close over the wires and the light comes on. The problem shows up later. The light flickers for no clear reason, or stops working entirely on a circuit that tested fine at installation. The fine-stranded fixture leads were not fully captured by the wire nut spring. Some strands ended up outside it rather than inside. The connection had reduced contact area from day one, and thermal cycling gradually loosened what grip was there.
It also covers the stranded-to-solid splice where most failures happen, including the technique that makes wire nuts work on this connection and where inline lever wire connectors take the guesswork out of it in a tight housing.
Need UL-listed inline lever connectors for recessed lighting connections?

Why Recessed Lighting Wiring Is Harder Than It Looks
Recessed lighting wiring is different from a standard ceiling fixture connection in two ways that compound each other.
First, the working space. The wiring area in a recessed fixture is tight, access is from below, and you are working overhead with short wire tails. Holding conductors aligned while applying a wire nut is harder here than at a hanging junction box.
Second, the conductor type mismatch. The house wiring feeding the circuit is solid-core 14 AWG or 12 AWG, which holds its shape and pushes firmly against whatever it contacts. The leads coming from the LED fixture or from the driver output are fine-stranded, flexible, and thin. When you try to combine those two types in a wire nut, the solid wire tends to push the stranded leads aside rather than twisting together with them. Some strands end up outside the nut spring rather than inside it. The connection looks done, tests fine, and fails under load after a few months.
The Family Handyman put it plainly: light fixture connections almost always require connecting solid wire to stranded, and the wire nut pushes the stranded wire rather than grabbing it. The workaround of making the stranded lead slightly longer does improve the result, but there is an approach that handles the mismatch more consistently, particularly in the confined space recessed lighting wiring creates.
Recessed Lighting Wire Colors
House wiring uses black for hot, white for neutral, and bare copper or green for ground. Red is present when the box is wired for two switches. The LED driver's line-voltage input leads (black and white, fine-stranded) connect to those house wires inside the junction box. Match black to black, white to white, and connect the grounds first. If the fixture uses plug-in pigtails rather than hard splices, use them as supplied.
The Better Way to Make Recessed Lighting Wire Connections
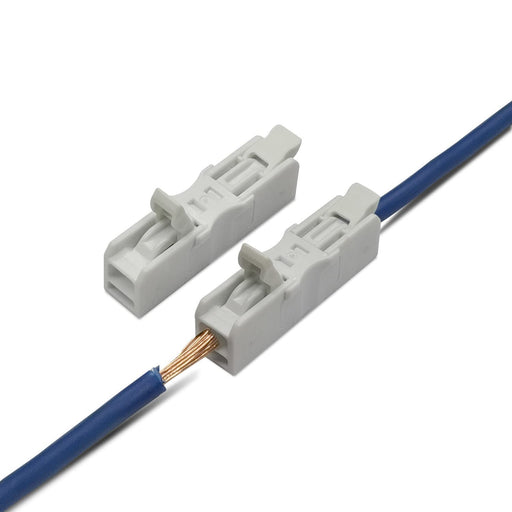
Inline lever wire connectors handle the stranded-to-solid mismatch that makes wire nuts unreliable on recessed lighting connections. Each port has its own lever and spring clamp. Open the lever, insert the conductor, close the lever. The clamp grips at defined pressure regardless of conductor type, with no relying on whether the spring captured all the strands.
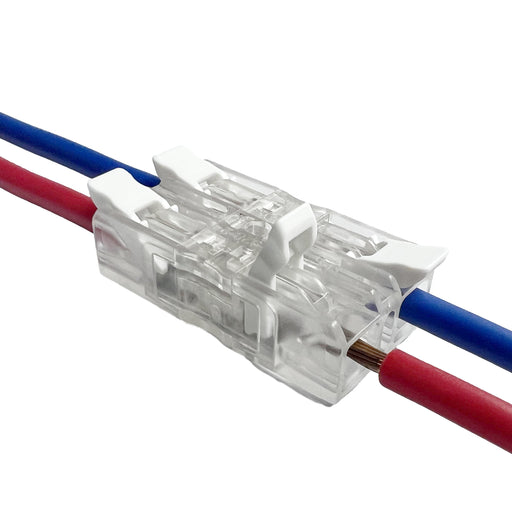
The clear inline connector is particularly useful for recessed lighting work. The transparent housing lets you confirm that each conductor is fully seated before you close the lever. Working overhead in poor light, inside a housing that doesn't give you much room to see what your hands are doing, that visual confirmation is worth having. Once both wires are inserted and the lever is closed, you can verify the connection is live using the test hole at the base of each port without opening anything.
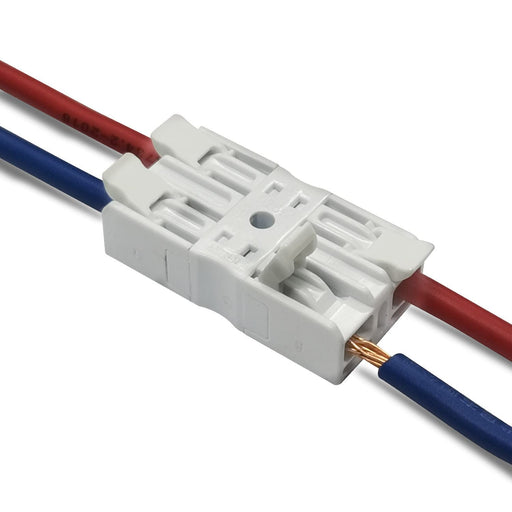
The compact inline profile also sits more cleanly in a recessed housing than a wire nut splice. When you tuck the connections up, it takes less room and puts less stress on short wire tails.

Step-by-Step Recessed Lighting Wiring with Inline Lever Connectors
These steps apply to standard recessed lighting wiring with an integral junction box or driver housing.
Before you start
Turn off the circuit breaker, not just the wall switch. Verify with a non-contact voltage tester at the ceiling box wires.
Step 1: Prepare the wires
Strip 0.39 inches (10mm) from each conductor. For the fine-stranded fixture leads, twist the strands clockwise after stripping to consolidate them into a bundle. This stops strands from spreading at the port entry. For the solid house wiring, if existing conductors have nicks or deformation at the tips, cut back to clean copper and restrip.
Step 2: Connect the ground first
Join the bare copper house ground to the green fixture ground. If there is a grounding screw on the housing, also connect a short pigtail to that screw. For two or three conductors, a multi-port lever connector from the
Step 3: Connect neutral and hot
White house wire to white fixture lead. Black house wire to black fixture lead. Open the lever on each port, insert the conductor fully until it seats at the internal stop, close the lever. On the clear inline connector, check through the housing that both conductors have reached the end of the cavity before closing.
Insert one conductor at a time. Do not try to manage both ports simultaneously while holding the fixture up. In a recessed housing with short wire tails, this is where conductors get only partially inserted. One at a time is slower by a few seconds and far more reliable.
Step 4: Test before closing the housing
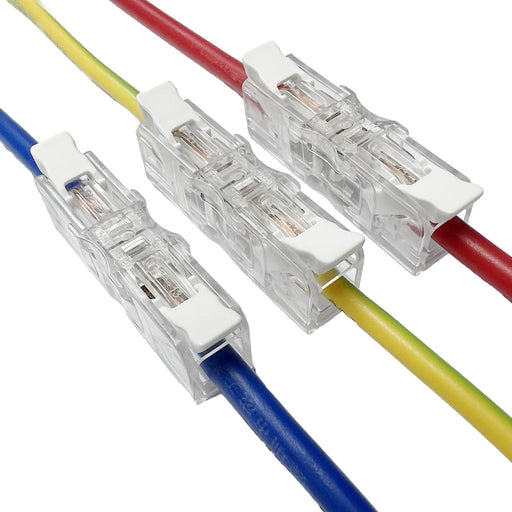
Restore power and test the fixture from the wall switch before securing the housing. The test holes on Dicio inline connectors let you verify voltage at each connection with a meter probe without opening anything.

Dicio inline lever connectors are UL-listed, reusable, and built for exactly these splices.
Troubleshooting Recessed Lighting That Flickers or Fails
Most recessed lighting wiring problems trace back to the connection quality at the junction box or driver housing. The recessed nature of the fixture means those connections are harder to inspect, and a flickering light is often the only indication something went wrong at installation. Here is how to identify and fix the most common failure patterns.
- Light flickers but does not go out: High-resistance connection under load. The most common cause is a wire nut where some strands of the fixture lead were not captured. Open the connection, restrip both conductors to 10mm, and remake using an inline lever connector with each wire fully inserted independently.
- Light works at first then stops: Connection that passed an initial test but failed under thermal cycling. Same diagnosis as flickering: marginal contact area that degrades with heat. Open, inspect, restrip if there is any oxidation or deformation, remake the connection.
- Light never came on: Open circuit. Check that both conductors are fully inserted in the connector ports, that the fixture ground is connected, and that the switch wiring at the wall is correct. Use the test holes on the lever connector to verify voltage is reaching each connection point before pulling the fixture.
Frequently Asked Questions
Why does my recessed light flicker after installation?
Flickering after installation usually means a high-resistance connection at the junction box. The most common cause is a wire nut connection where some strands of the fine-stranded fixture lead were not captured by the spring. The connection passes an initial test but degrades under the thermal cycling of normal use. Open the connection, restrip to 10mm, and remake using an inline lever connector with each conductor inserted independently into its own port.
Can I use standard wire nuts for recessed lighting wiring?
Wire nuts work on recessed lighting connections, but they are unreliable on the stranded-to-solid splice between the house wiring and LED fixture leads. The spring pushes fine-stranded wire rather than gripping it cleanly, particularly when you are working one-handed overhead in a tight housing. Inline lever connectors handle both conductor types in separate ports and produce a more consistent connection in that installation condition.
What is the correct strip length for recessed lighting connections?
For Dicio inline lever connectors, strip exactly 0.39 inches (10mm) from each conductor. Shorter than this and the conductor does not reach the internal contact surface. Longer leaves bare copper outside the housing, which violates NEC 110.3(B). For the fine-stranded fixture leads, twist the strands tightly after stripping before inserting.
Do I need a junction box for recessed lighting wiring?
Yes. NEC 300.15 requires that conductor splices be enclosed in a listed junction box that remains accessible for future maintenance. Most recessed fixtures have an integral junction box built into the housing that satisfies this requirement. All wiring connections must be inside that box with the cover plate secured, not left loose in the ceiling cavity.
Can inline lever connectors be reused when replacing a recessed light?
Yes. Open the lever and the wire releases cleanly. Close it on the new conductor and the clamp resets. For recessed lighting where replacing a fixture means revisiting the same connections, this is a real practical advantage over wire nuts. See the complete inline lever wire connector guide for more on reusability and conductor compatibility.
What gauge wire do LED recessed lights typically use?
The house wiring feeding the circuit is typically 14 AWG on a 15-amp circuit or 12 AWG on a 20-amp circuit. The leads coming from the LED fixture or driver are usually 18 AWG fine-stranded. Dicio inline lever connectors cover 24-12 AWG and handle the mixed-gauge combination comfortably with each conductor in its own port.
Getting Recessed Lighting Connections Right
Recessed lighting wiring is not complicated, but the combination of fine-stranded fixture leads, solid house wiring, and tight working conditions is where wire nut connections underperform. The difference between a reliable installation and a flickering callback often comes down to whether the stranded leads were properly captured.
Inline lever wire connectors remove the variable. Each conductor goes into its own port independently. The transparent housing on the Dicio clear inline connector confirms insertion before the lever closes. The test holes confirm the circuit is live without opening anything. And if the fixture needs replacing down the line, the connections open cleanly and reconnect without cutting wire.
For the full picture on inline lever connectors across all applications, wire gauge compatibility, and NEC code requirements, see the complete inline lever wire connector installation guide.
UL-listed, reusable inline lever connectors for recessed lighting and fixture wiring.
Featured collection
-
Original price $13.99 - Original price $58.99Original price $13.99 - Original price $58.99Original price $13.99$11.99 - $52.00$11.99 - $52.00Current price $11.99
Inline Lever Wire Connector Nuts [White]
Dicio ConnectorsIn stockProduct Features Elegant White Design: The Dicio inline connectors feature a pristine white body, seamlessly complementing modern designs and pr...
View full detailsOriginal price $13.99 - Original price $58.99Original price $13.99 - Original price $58.99Original price $13.99$11.99 - $52.00$11.99 - $52.00Current price $11.99Save up to 12% -
Original price $8.99 - Original price $43.99Original price $8.99 - Original price $43.99Original price $8.99$6.99 - $38.99$6.99 - $38.99Current price $6.99
Inline Wire Connectors – Clear, Tool-Free, UL-Listed, 22–14 AWG | Dicio
Dicio ConnectorsIn stockDicio’s clear inline connectors make wiring clean and simple. Built for 22–14 AWG copper wires, these compact, tool-free splice caps feature a tra...
View full detailsOriginal price $8.99 - Original price $43.99Original price $8.99 - Original price $43.99Original price $8.99$6.99 - $38.99$6.99 - $38.99Current price $6.99Save up to 11% -

 Original price $309.99 - Original price $309.99Original price$309.99$309.99 - $309.99Current price $309.99
Dicio White Inline Lever Wire Connectors 6-Port 24-12 AWG | 500 PCS/Box | 928_3_white
Dicio ConnectorsIn stockDicio White Inline Lever Wire Connectors are designed for quick, secure, and reliable inline wire splicing in residential, commercial, lighting, ju...
View full detailsOriginal price $309.99 - Original price $309.99Original price$309.99$309.99 - $309.99Current price $309.99 -

 Original price $399.99 - Original price $399.99Original price$399.99$399.99 - $399.99Current price $399.99
Dicio White Inline Lever Wire Connectors 4-Port 24-12 AWG | 1000 PCS/Box | 928_2_white
Dicio ConnectorsIn stockDicio White Inline Lever Wire Connectors are designed for quick, secure, and reliable inline wire splicing in residential, commercial, lighting, ju...
View full detailsOriginal price $399.99 - Original price $399.99Original price$399.99$399.99 - $399.99Current price $399.99 -

 Original price $529.99 - Original price $529.99Original price$529.99$529.99 - $529.99Current price $529.99
Dicio White Inline Lever Wire Connectors 24-12 AWG | 2500 PCS/Box | 928_1_white
Dicio ConnectorsIn stockDicio White Inline Lever Wire Connectors are designed for quick, secure, and reliable inline wire splicing in residential, commercial, lighting, ju...
View full detailsOriginal price $529.99 - Original price $529.99Original price$529.99$529.99 - $529.99Current price $529.99